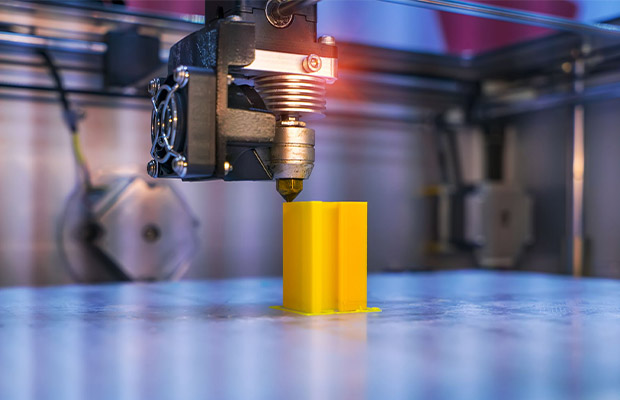
The nozzle is your 3D printer’s most crucial component. Because it influences a printer’s extrusion and can cause a variety of printing issues if it isn’t functioning properly, the nozzle is very significant. Furthermore, not every nozzle is the same. Its lifespan and performance are affected by the material, diameter, and other factors. It must be cleaned thoroughly. How to clean 3D printer nozzle?
Using a nozzle cleaning kit and a cleaning filament is the most effective way to clean your 3D printer nozzle. To get rid of any remaining impurities from the filament, you can take the nozzle off and soak it in acetone. A brass wire brush with soft bristles will help eliminate any leftover filament residue.
In this piece, we’ll discuss how to maintain your printer’s nozzle, avoid problems from developing, and resolve any that may arise. Let’s get started.
Table of Contents
Symptoms Of Clogged 3D Printer Nozzle
There are obvious signs that the nozzles are clogged or jammed because they are dirty.
Continuous Adjustment Of Feed Rate
You would need to make repeated adjustments to the feed rate or flow settings, which you never made before. This indicates that the particles are building up at your nozzle, where clogging has already begun.
The Problem In Extrusion
The extrusion, the very first layer of printing, will start to appear uneven and won’t remain consistent throughout the entire printing process.
Motor Thumping
Another sign is when the motor powering the extruder begins to thud, which causes it to jump back as it struggles to keep up with the other components that turn it.
Dust
It would be obvious that you needed to clean everything starting with your nozzle if you noticed more dust than usual around the extruder and motor part.
The Odd Scraping Sound
The extruder is making an odd scraping sound as a result of grinding the plastic and being unable to move the gear quickly enough at the moment.
Other Symptoms
Inconsistent or rough printing, print blobs, and a weak layer adhesion feature would start to appear on the printer.
How To Clean 3D Printer Nozzle?
You shouldn’t be alarmed if your 3D printer is exhibiting nozzle-clogging symptoms. A combination of simple techniques, which we’ll discuss below, can frequently be used to unclog a hot end. It is also important to note that the cleaning procedure will differ depending on whether your 3D printer is experiencing a partial clog (i.e. material is still being extruded but at inconsistent rates) or a full clog (i.e. no melted filament is being extruded). Here’s how to clean a 3D printer nozzle:
Partial Clog
Cleaning filament: A dedicated cleaning filament can be used to remove nozzle debris from a partial clog. However, they are made specifically for cleaning, not for 3D printing, and are frequently nylon-based. Simply raise the temperature of your 3D printer just a little bit above that of your most recent print job to use cleaning filament. Be careful not to set the temperature too high as this can result in the burning of the filament clog inside the nozzle.
The cleaning filament should be fed through the nozzle once it reaches the proper temperature. The cleaning should be effective if you see remnants of the original filament emerging with the cleaning filament. Until it emerges clean, keep extruding the cleaning filament. From there, your 3D printer ought to be ready to use.
Wire brush: The first thing you should do if the surface of your 3D printer nozzle is coated in filth and melted filament. To do this, scrub any dirt or filament buildup from the nozzle with a brass wire brush (steel brushes are too abrasive). To make it simpler to remove the filament with the brush, heat the nozzle before using it. Alternatively, you might try using an alcohol wipe to remove any lingering filament.
Fulllog
Needle: The 3D printer nozzle debris removal process using this technique is among the simplest. Start by bringing the hot end up to the temperature necessary to 3D print the previous material. Then, carefully poke upwards through the nozzle hole using a fine needle or wire, such as an acupuncture needle or a thin steel guitar string. The filament debris that is clogging the nozzle should be broken up as a result, making it easier to extrude.
If you choose to use the needle method, make sure that the needle you use has a smaller diameter than the nozzle itself to avoid damaging it. Since acupuncture needles are less likely to break inside the nozzle than drill bits, using them is also advised.
Cold Pull: Start by heating the extruder of the 3D printer to about 250°C in order to use the cold pull technique. (Use a lower temperature, like 200°C, if you are using PLA for this method.) Push the filament through the print head when the nozzle is hot. After that, allow the filament to solidify and the nozzle to cool. Reheat the extruder to a lower temperature (like 115°C), and when it reaches 90°C, quickly pull the filament up and out of the nozzle. For cold pulls, soft filaments like nylon tend to perform best.
If the 3D printer filament end has a shape similar to the inside of the nozzle, the cold pull technique was successful. This technique works well because the filament is adhered to by the particle buildup inside the nozzle as it solidifies. However, getting a thoroughly cleaned nozzle occasionally requires several cold pull attempts.
Atomic Pull: The cold pull method for cleaning the nozzle is similar in concept to the atomic pull, also known as the atomic method. The nozzle is heated throughout, as opposed to being allowed to cool to room temperature. To begin, take the original filament out of the 3D printer. After that, set the nozzle temperature to 220°C or 250°C if you are using PLA. Manually feed filament through the hot end until it begins to extrude once the nozzle has reached the proper temperature. After that, reduce the nozzle temperature to 90°C for PLA or 160°C for ABS or PETG. Pull the filament out of the nozzle once this temperature has been reached.
Similar to the cold pull method, atomic pull will have been successful if the filament tip resembles the interior of the hot end. If necessary, repeat this procedure several times to get rid of the obstruction-causing debris. For its desktop 3D printers, Ultimaker advises the atomic pull technique. The bowden tube may need to be removed before the filament is manually inserted if you are using an Ultimaker system or another 3D printer with a bowden tube that feeds into the nozzle.
Acetone: The hot end of the 3D printer would then need to be taken out and cleaned if the pulling techniques are failing to sufficiently clear the nozzle. Utilizing a solvent like acetone is a typical technique for cleaning the nozzle. When using ABS filament, acetone works best. Ethyl acetate can be used to dissolve PLA, on the other hand.[2] The nozzle is simply immersed in the solvent or acetone for a few hours using this technique. From there, it should be simple to eliminate any remaining filament particles that contributed to the clog.
Read More: How To Clean A 3D Printing Bed?
How To Unclog A Clogged 3D Printer Nozzle?
No need to worry if your nozzle is already clogged! The task of cleaning a nozzle is simple and can be accomplished using a few different techniques.
Nozzle Cleaning Kit
A brush, tweezers, and thin metal needles make up a typical nozzle cleaning kit. You can use this method to clean out your nozzle by following these steps:
- Start by warming up your nozzle to just below its maximum temperature. Any filament that has become lodged inside the nozzle will soften as a result.
- The larger filament fragments that may be obstructing the nozzle can then be removed using metal needles.
- Use the nozzle brush to remove any remaining smaller filament fragments after the larger pieces have been eliminated.
- To get rid of any last bits of filament or debris, use the tweezers.
Drill bits are one solution that some people use, but stainless steel needles are a better option. Unlike steel needles, drill bits will change the diameter of the nozzle or harm its surface.
Cold Pull
To unclog the nozzle and clear out any debris inside of it, a cold pull or an atomic pull is frequently used. It is a simple method that does not require disassembly or cleaning tools to clear the clog.
The best results will be obtained when using nylon filament. If Nylon is not readily available, you can nevertheless also use PLA, ABS, or a special cleaning filament (more on this later).
The nozzle must first be heated to your filament’s printing temperature. After that, you will need to push the filament manually until it emerges from the nozzle. Now that you’ve pushed the filament into the nozzle, you can let your hot end cool.
The extruded material from the nozzle tip must first be removed in the last step. Then set the printer temperature to 85-90 °C. Pull the filament completely out of the nozzle as you gradually raise the temperature to this point.
To clean any debris and filament fragments from the inside of your nozzle, you might need to repeat this process several times. Once you realize the cold-pulled filament is free of debris, you can stop.
Soaking The Nozzle In Aceton
With filaments like ABS, a nozzle cleaning kit and cold pull may not always be practical, and your nozzle may still be clogged. A good way to clear clogs in ABS is to remove the nozzle and soak it in acetone.
Prior to removing the nozzle from the hot end, heat it up first. The heater block is slightly loosed from the nozzle by heating it, which also makes it simple to unscrew. To remove the nozzle effectively and safely, use a spanner or nozzle removal tool.
Once the nozzle has been removed, soak it for about 30 minutes in a cup that has been coated with acetone. Any ABS filament that is stuck inside the nozzle will be easier to remove with the help of the acetone.
A wire brush can be used to get rid of any remaining filament after the soaking is finished. As the nozzle tip is where most clogs form, make sure to also clean it.
Now that your 3D printer has been put back together, you can resume printing. Initially, make sure to thoroughly dry the nozzle. This can be done with a paper towel or soft cloth.
To maintain the best print quality, keep an eye on your nozzle at all times and clean it frequently.
Using A Heat Gun
While acetone soaks are beneficial for ABS filament, they are less useful for other filament types. Particularly resistant to acetone are PETG and nylon.
Using a heat gun to clear your nozzle clog when working with these filaments will be helpful.
The 3D printer’s hot end or extruder assembly must first have the nozzle removed. The procedure for ABS soaking is the same as this.
The nozzle must then be heated using the heat gun until the filament inside melts.
You can clean out the nozzle’s debris after the filament has melted by using a wire brush or a thin needle. The nozzle is now hot; proceed with caution.
You can restart printing after reattaching the nozzle to the hot end assembly. Prior to reattaching the nozzle, make certain that it has been properly cooled down.
How Often To Clean 3D Printer Nozzle?
For routine maintenance, you should clean your nozzle whenever it becomes noticeably dirty or at least once every three months. It’s not the end of the world if you don’t clean your nozzle frequently, but it does help to extend the life and durability of your nozzle.
Many people, I’m sure, don’t clean their nozzles very often and everything still functions properly.
The frequency of your 3D printing, the type of nozzle you use, the materials you are using, and other maintenance procedures all factor into this.
If you exclusively print with PLA at low temperatures and use the best bed leveling techniques, brass nozzles can last a very long time.
How To Prevent 3D Printer Nozzle Clogs?
Regularly Use 3D Printer Cleaning Filament
3D printing cleaning filament is the easiest way to clean your nozzles from the inside. It is made of a substance designed specifically for cleaning and removing plastic from injection molding equipment. You must extrude it at the filament’s printing temperature until a clear, white strand of material devoid of any debris or filament color emerges from the nozzle.
Even though cleaning filament might seem a little pricey, it does work well and removes any partial clogs. Furthermore, you only require a small quantity. For efficient nozzle cleaning and to avoid nozzle clogs, use it every 100 to 200 hours of printing.
Replace Worn-out Nozzles
As a result of the filament’s constant friction, brass nozzles are subject to significant wear. Glow-in-the-dark, carbon fiber, and metal-filled filaments are examples of abrasive filaments that cause wear to accelerate.
In addition to damaging the nozzle opening, abrasive filaments can cause the nozzle material’s tiny metal particles to begin accumulating. This may obstruct the flow of the filament and cause jams.
Replace your brass nozzle more frequently if you frequently use abrasive filaments or notice significant nozzle wear.
You can also use nozzles made of stainless steel or other hardened materials. Compared to standard plain brass nozzles, these are more durable and resistant to abrasive filaments.
Fix The PTFE Tube Hot End Gap
The tube completely encircles and rests on top of the nozzle in a PTFE-lined 3D printer hot end. The melted filament will ooze out of the PTFE tube’s nozzle if the gap between them is not flush. Plastic filament will eventually accumulate inside the hot end, causing jamming.
Inadequate PTFE tube couplings are what’s to blame for the gap. The PTFE tube starts sliding in and out of the hot end, leaving a space between it and the nozzle, as the couplings become less effective. The hot end filament jam is indicated by the extruder skipping and under-extrusion.
If you notice these problems, you need to fix the PTFE tube gap inside the hot end right away.
Make sure the PTFE tube has been flushing cut at a 90° angle first in this situation. If it slopes, it will never perfectly line up with the hot end.
Second, it is beneficial to use fresh pneumatic couplings on both the extruder assembly and the hot end assembly in place of the old ones that are worn out. The PTFE tube will remain in place as a result over time.
Use High-Quality Filament
With less nozzle clogging and better print quality, high-quality filament is a good investment. High-quality filament producers make sure that their product has few to no impurities, is produced in a dust-free environment, has a constant diameter, and is properly vacuum-packed to minimize as many flaws in the material as possible.
In our Best PLA, Best ABS, and Best PETG articles, we have compiled a list of the highest caliber filament. If you believe that low-quality filament is to blame for your clogged nozzles, we advise you to check out these brands.
These filaments may cost more than less expensive materials, but they are frequently worthwhile spending more money on.
In addition to saving time, they also produce better results. Quality filaments can be a wise investment if you want to sell your 3D prints and profit from your 3D printer.
Keep Filament Clean And Dust-free
Nozzle clogs can be significantly avoided by keeping the area where 3D printing takes place clean. If your plastic filament is exposed to the environment while printing, it will gather dust particles that clog your nozzle. In order to avoid dust buildup on it after printing with it, you should store it out of direct sunlight and in a storage box.
Using a 3D printer enclosure is another way to shield your 3D printing setup from dirt and grit. These keep the 3D printer itself clean in addition to the current filament in the printer.
Conclusion
You can achieve the best print quality and lessen the risk of clog-related 3D printer damage by keeping the nozzle clean. Your 3D printer’s nozzle will last longer if you regularly clean it, reducing the likelihood of an unexpected failure and avoiding downtime.
Nozzles are not indestructible. In particular, when they are filthy, clogged, or overused, they deteriorate over time. Because of this, it’s crucial to regularly clean your printer’s nozzle and make sure it’s functioning properly with the other hot end parts on the printhead assembly. The lifespan of your nozzle will be increased by doing this.