Printing screens on a budget can be difficult. They cannot simply be used once and then discarded. You have to look after them and keep them in good shape. This is why it is important for you to learn how to clean screen printing screen properly.
Future prints may be compromised if the screen is not thoroughly cleaned after use, especially if using water-based inks. This is because it will be more difficult to completely remove any leftover ink.
For a straightforward procedure that will give you high-caliber designs for your subsequent print job, keep reading.
Table of Contents
What Equipment Should Be Used in Cleaning Screen Printing Screens?
Therefore, it stands to reason that the first component required for the process is a dirty screen. For removing large chunks of dried ink and emulsion, you will then need paper towels. A scrub brush will also be necessary. Additionally, a pressure washer is necessary.
It can be messy to use a pressure washer on screens, so you might want to think about using a spray out tank to catch the extra water and chemicals.
Dip tanks are an additional optional component that can be used to clean screen printing screens.
Related Reading: How Long Does Screen Printing Last?
How to Clean Screen Printing Screen at Home?
When cleaning screens, there are two ways to go about it depending on whether you’re going to reuse the screen or recycle it.
Reusing the Screen
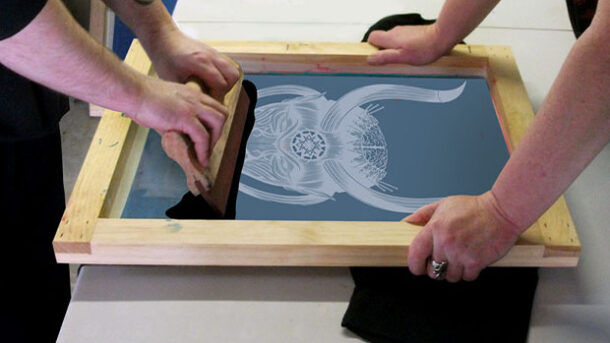
It is not necessary to remove the tape from the screens’ edges before reusing them. Take a dry towel or rag and wipe off any excess ink that formed during screen printing. Once you’ve finished, spray the screen with cleaning solution and rub it in with a rag.
The screen does not need to be as meticulously cleaned as it would if you were switching to a different ink color for the next print run if you are using the same ink color. In order to see through the emulsion on the screen for the upcoming job, make sure to thoroughly clean it.
Reclaim Screens
Please abide by this instruction manual when recycling screens, and never handle chemicals without gloves or eye protection.
- 1. Remove any tape or plastic that may be on the screen’s surface or on its sides as a first step. The ink will be completely removed thanks to this.
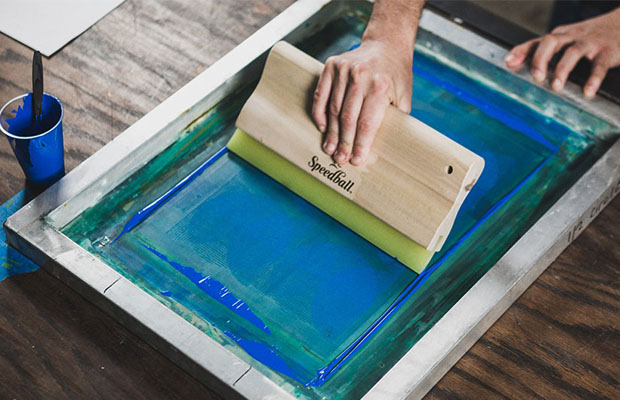
- 2. Then, if you intend to reuse the ink, scrape off the excess and collect the ink that has collected on the screen with a squeegee.
- 3. To keep the ink from drying out, wipe off any excess ink from the screen and the squeegee with a rag. A piece of wax paper or a piece of plastic can also be used to remove ink. Without using excessive chemicals on the screen, this is a simple method of removal.
- 4. Make sure the print side of the screen is facing up as you place it on a horizontal surface. Spray a generous amount of screen reclaimer onto the screen and allow it to sit for 2 minutes, or as otherwise directed by the manufacturer’s instructions. Your screen may get damaged if you leave the cleaner on for an extended period of time. Another option is to soak the screen in isopropyl alcohol using paper towels or a rag and let it sit for a few minutes.
- 5. When the cleaner has had time to sit, lightly scrub the screen with a coarse brush to remove the emulsion. Use a pressure washer with a PSI between 1,500 and 2,000 to remove the cleaner and any scrubbed-up residue. Check the tension on your screens again if you discover that there are still spots with ink buildup after using the pressure washer because screens with a loose tension are more likely to accumulate unneeded ink. For retensionable screens, tighten the mesh more so that cleaning is simpler. If the tension is not an issue, try power washing the screen from the opposite side or repeating the process of scrubbing in the solution and powerwashing it off until the desired results are obtained.
- 6. Degreaser should be applied to the front and back of the screen after the emulsion remover and power washer have been used. Any impurities that may still be present will be eliminated. The emulsion may not adhere to the screen well later if this step is skipped. Clean the screen’s surface with the degreaser, then use the power washer to remove it.
- 7. Last but not least, allow the screens to quickly dry naturally. To prevent pinholes or stencil damage, place the screen close to a window, in an open space, or in a room with low humidity. Use a haze remover to get rid of any ghost images that may remain after the screen has dried.
You May Also Like:
- Can You Screen Print on Polyester?
- How To Remove Screen Printing?
- How to Burn Screens for Screen Printing?
FAQs
How to Remove Dried Ink from Silk Screen?
An old rag should be filled with mineral spirits. Rub the rag on the screen gently in a circular as well as side-to-side motion. If paint still manages to get caught between the mesh, dab a little paint thinner onto a rag and gently rub the screen.
How to Reclaim a Screen Printing Screen?
- Wetting the screen on both sides is the first step in recovering your screen.
- Use Screen Reclaimer.
- Scrub the emulsion.
- Use a pressure washer to remove the emulsion.
- Apply a degreaser or dry screen as the fifth step.
How to Remove Plastisol Ink from Screen?
Spray either Sgreen Supreme Wash or Sgreen Ink Degrader on your screen while it is flat, then wipe it down with a rag.
The Bottom Line
Screen printers want their screens to last as long as possible. After every job is finished, they don’t want to have to buy a new screen.
Buying a dip tank might be a good idea if you need to recover several screens quickly and have limited time. Buying Dip Tank Solution and following the mixing directions is all that is required.
Following the preparation of the solution and water mixture, you can pressure wash your screens by removing them from the dip tank after 3 to 5 minutes. Your screens will remain in excellent condition and have a longer lifespan as a result.
Part of the job involves performing proper screen cleaning and maintenance. Preserve your income and investment.
Read More: