Have you tried to successfully burn a screen for days without any luck? Maybe you’re a beginner screen printer trying to learn how to burn screens.
When it comes to screen printing, burning screens is a critical step. To produce a print of the highest caliber, you must learn how to burn screens for screen printing properly. Without the necessary technical knowledge, it could be difficult and frustrating.
A number of issues can result from improper exposure times, such as screens that fail on the press as you are printing or screens that do not wash out or develop after exposure.
We will describe how to burn good, consistent screens in this article and provide you with advice on how to burn screens correctly.
Table of Contents
What to Consider before Burning a Screen?
You must take a few factors into account before burning your screen because they have an impact on the exposure time. Let’s briefly explore them:
Type and Amount of Emulsion Used
Emulsion should be applied to your screen before burning it. Exposure times vary between brands and types of emulsion. For instance, a fast-burning emulsion can expose in a matter of seconds, whereas a slower-burning emulsion may take ten minutes. There are generally three types of screen-printing emulsion:
- Diazo emulsions are the cheapest options but require longer exposure times, as they have lower light sensitivity. It is also the most forgiving if you unintentionally underexpose or overexpose it.
- Presensitized (pure Baselayr Complete and other Photopolymer) emulsions expose more quickly than Diazo and are much more sensitive. Since these emulsions are extremely sensitive to even cloudy day sunlight, it is important to handle them carefully.
- Dual-cure emulsions, like Combining the best qualities of Diazo and photopolymer emulsions, Baselayr Long-Lasting. While not as quickly as photopolymer emulsions, it cures much more quickly than Diazo emulsions and has a wider exposure time range.
Light Source
The kind of light source and light placement vary based on your exposure unit. Unfiltered backlights, quartz halogen, mercury vapor, or metal halide lights are some possible options for the light source. The exposure time decreases with increasing bulb wattage. In addition, the exposure time decreases and increases depending on how near the light source is to the screen. However, if the light source is too close, some areas of your screen will have dead zones (i.e., areas that aren’t sufficiently exposed to the light source).
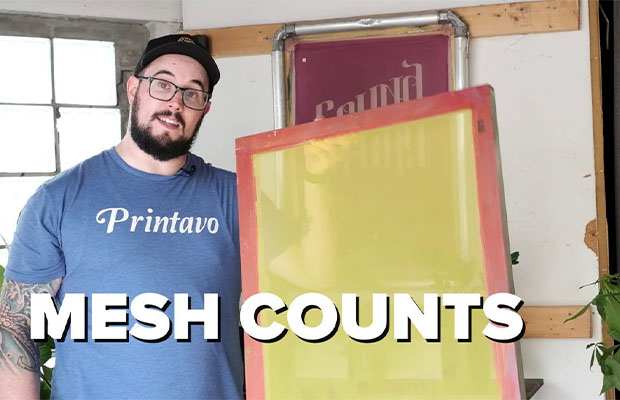
Screen Mesh Count
The screen mesh count should be the final consideration before burning your screen. The number of mesh openings per square inch of your screen is measured by the mesh count. Wider openings on lower-mesh screens can hold more emulsion, but longer exposure times are required because of this. Higher-mesh screens can hold less emulsion in their openings.
What Do Underexposed and Overexposed Screens Look/feel Like?
Sections that aren’t a part of the image are washed away as a result of underexposure. Since the emulsion hasn’t yet dried, the screen feels slimy when you wet it. Additionally, pinholes, scums, and sawtooth can appear in your print as a result of underexposure.
On the other hand, an overexposed image is challenging to remove. The unexposed areas can take up to five minutes to wash clean, or they may never get clean at all. Undercutting is another possibility, where the picture becomes fuzzier or gets smaller around the edges.
Related Reading:
How to Burn a Screen for Screen Printing?
Now that we’ve covered the essentials, let’s walk you through the process of burning a screen, and some tips to burn screens properly:
Getting the Film Positive Right
The failure to create good opaque film positives is one of the common errors people make when beginning screen printing. To effectively block UV light, the film must be covered in enough black ink. The black stencil shouldn’t let any light through when you hold the film up to a source of light. If not, you risk having the emulsion that you are attempting to block out exposed when light manages to pass through.
When your design is ready, use a printer to print it on the film. For canon laser printers, manually set the media type to “Transparency” in the printer driver. For Canon inkjet printers, set the media to “Glossy Photo Paper (II)” before printing.
We advise using an inkjet printer for the best prints. Additionally, since it absorbs ink and holds the most black ink, you should use a waterproof film. Additionally, RIP (Raster Image Processing) software aids in producing the output that is the darkest and of the highest quality. Additionally, you can use two screens at once by stacking them during exposure.
Figuring Out Your Exposure Time
You should carry out a Step-Wedge test to obtain the best screen exposure time. Any artwork you want to print should be combined with the step wedge on a film. Find the best exposure time for the specific screen mesh count, light source, and emulsion you’re using by testing the time required in steady increments after that. Cover the screen and gradually reveal each section. The step wedge should have a gradient level of 7 for the best exposure.
The increments you use are determined by the emulsion (how quickly it burns), your light source (how much UV light and watts it has), and both. It could be in intervals of 5, 30, 1, 1, 2, or more minutes. Using photopolymer emulsions, for instance, would allow you to experiment with increments of 5–10 seconds, whereas Diazo emulsions would allow you to experiment with 30–60 second time intervals.
As an alternative, exposure calculators can be used to calculate exposure time. You can use a variety of free exposure calculators for screen printing, including the Anthem Screen Printing Exposure Calculator and the Kiwo ExpoCheck, among others. To get an accurate reading for determining exposure time, you’ll need to pay some money (about $19.99 on eBay), but these free alternatives are a great option. You’ll be good to go as soon as you understand the directions.
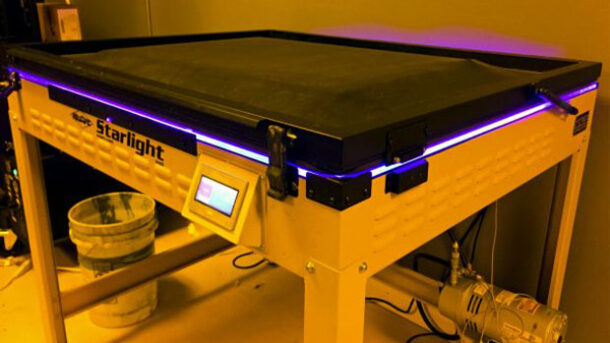
Setting Up Your Exposure Unit and Light Source
Your screen exposure units affect the print quality as well. A self-contained vacuum exposure unit with a metal halide bulb is the industry standard for screen printing. To ensure that the film and screen expose properly, it is best if the light source is at least 2-3 feet away from them.
Although LED exposure units are a good and energy-efficient light source option, they lose a little bit of detail during exposure compared to metal halide bulbs. Thus, it is not ideal for producing fine lines, small dots, etc. However, fluorescent lighting is inexpensive but low in UV content, so light does not always pass through the emulsion. The squeegee side may not be sufficiently exposed while the substrate side may be, which can lead to the screen breaking down too soon. Halogen bulbs are also inexpensive and widely available, but because they emit little UV light, they also blur details when exposed.
You can create your own exposure unit as well. Thought should be given to the type of lighting you employ as well as the distance between the light source and the screen.
Burning the Screen
You can now start burning your screen if you have an emulsion-coated screen, a film positive, an exposure unit, and the appropriate exposure time. Your film positive should be placed carefully on the screen, and the film should be exposed on the exposure unit for the appropriate exposure time.
Rinsing the Screen
Don’t put the screen anywhere with UV light after it has been exposed. Avoid both regular bulbs and sunlight. To stop light from exposing the screen even after you’re done, we advise you to wet or rinse out your screen right away after exposure. If the rinse is done too late, the stencil or image may be overexposed.
As soon as the screen is exposed, you can place it in a dip tank to cause the emulsion to start liquifying in the blocked areas. Since the emulsion has already been released from the screen through this process, it is simpler and safer to rinse out the screen even in direct sunlight.
Extra tip: After post-exposure rinsing, you can expose a screen to UV light. This extra step will aid in hardening the emulsion and enhancing the screen’s durability over extended print runs.
Storing the Screen
Stay clear of the dust and debris. The emulsion and screens are easily contaminated with dust and debris, which then dries onto the screen. Pinholes may be produced by them, which you will notice after exposure, and halftones may even be blown out.
Your screen storage room will benefit from having a dehumidifier. For the best results during exposure, the dehumidifier allows water to evaporate from the emulsion and lets it dry. You don’t want the emulsion to become shiny and slick due to an excessive amount of humidity.
Cleaning Exposure Unit Glass
Keep your exposure unit glass and screens clean at all times. The glass in the exposure unit may become stained by dust, fingerprints, and leftover tape adhesive. Your exposure units should be regularly cleaned to remove any oil, dust, or dirt using any glass cleaner and a rag. Because of this, pinholes are avoided. It’s possible that the screen is dirty and you won’t realize it until after exposure when you start to see pinholes.
Read More: How to Remove Screen Printing?
Why Is Burning Screens Necessary?
No, there is no literal “burning” happening here. In order to burn a screen, it must first be covered in emulsion and then placed over a film positive with the film facing the UV light source on an exposure unit.
The screen is exposed when the emulsion is burned by turning on the light source for the proper amount of time. The areas of the film positive that are not covered in the black print harden, whereas the areas that are covered are not exposed and can be washed out. You are printing that as art.
You must learn how to burn a consistent, well-exposed screen if you want to produce artwork of the highest caliber. A screen that has been improperly burned may have been overexposed or underexposed, which can result in a number of issues, such as screens that take an eternity to wash out and develop, screens that degrade while being sprayed down, or screens that peel over time.
Correct screen burning also aids in preventing pinholes. Pinholes are tiny holes that you notice after the screen has been exposed; they are typically caused by dust or other debris getting on the screen before coating.
You also stay away from undercutting, which causes the edges of your image to become smaller or blurrier.
FAQs
How Long Should You Burn a Screen for Screen Printing?
Emulsion should be applied to your screen before burning it. Exposure times for various brands and emulsion types vary. For instance, while a slower-burning emulsion might take 10 minutes to expose, a fast-burning emulsion can do so in just a few seconds.
Can Screen Print Be Heat Pressed?
Many screen printers start by heat pressing transfers onto t-shirts, tote bags, or other garments. Clothes can be cured using heat presses, which are also excellent for printing at live events. Let’s go over all the advantages of owning a heat press and what you’ll need to succeed.
Can You Expose a Screen With the Sun?
The best time to expose a screen using the sun is at noon on a sunny day. That is when you will receive the most intense sunlight. If you expose your screens on a cloudy day, you won’t get the desired results. To determine the best days to expose your screens, consult the UV index in your weather app.
Conclusion
Burning or exposing screens for screen printing can be a very challenging and frustrating step, particularly if you are unsure of the ideal exposure period.
With the appropriate equipment and knowledge, you can confidently produce prints that are higher-quality, more dependable, more consistent, and more attractive while also increasing customer satisfaction. If you want to learn more about screen printing, read our post on how to clean screen printing screen.
Happy printing!